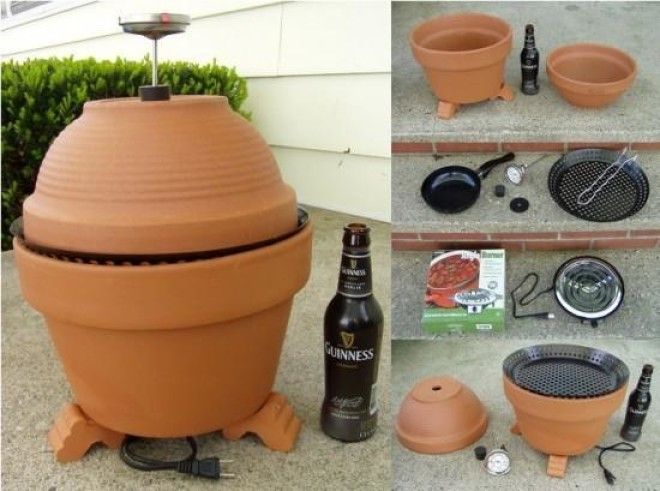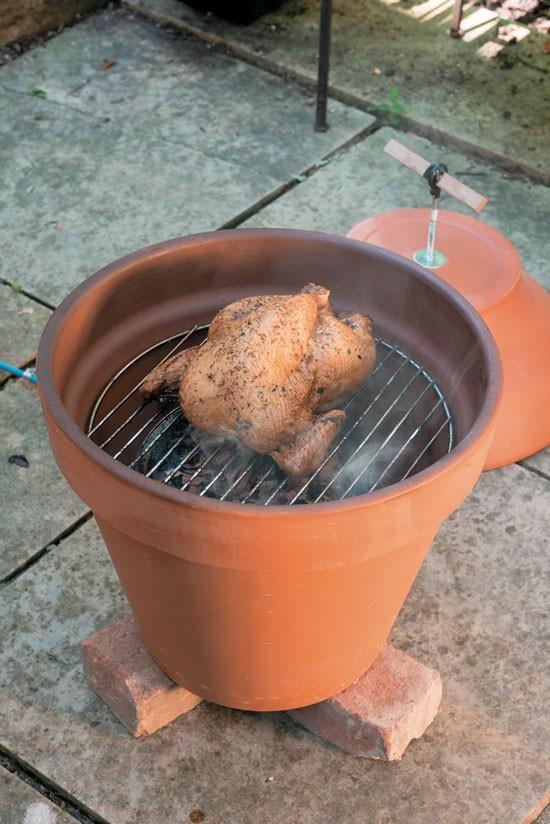
If the thought of smoking meat and fish conjures up images of heaps of hardwood, a large smokehouse, and a big investment of time and cash, think again. You can start small with this simple homemade clay-pot smoker that assembles quickly.
Begin this weekend project with a shopping trip for readily available materials, or by rooting around at home for spare parts. So, find your materials, lay out your tools, and let’s get cooking — outdoors.
How to Build a Smoker1 Purchase materials. Follow the materials list on Page 45. Because you’ll acquire parts to build this homemade smoker from a variety of sources, measure as you go and purchase the parts in the following order:
• Electric hot plate. The smaller, the better, but make sure it runs on at least 1,000 watts to maintain the temperature required for smoking meats.
• Clay pot. The bottom must be large enough to accommodate the hot plate and control knob, with a little room to spare.
• Grate. You can find a grate at hardware stores or online. The one you choose must be of the right diameter to nestle inside your clay pot about 1/4 of the way down the sides.
• Cover. Find a pot tray or a clay pot that will fit over, inside of, or directly on top of the lip of the larger pot. The cover should create a decent seal and not be prone to sliding off the larger clay pot.
• Handle. Make sure the handle assembly hardware will work with the cover you chose.
2. Drill a hole. Use a masonry or glass-and-tile bit to drill a hole — or enlarge an existing hole — in the bottom of the large clay pot for the hot plate’s electrical plug to pass through. To minimize the chance of damage as you drill the hole, cradle the pot on a bag of sand for support.
3. Assemble a handle for the lid. Use the eye bolt, bolt, washers, nuts, and a 6-inch length of wood or wood dowel. Drill a hole in the bottom of the clay cover for the
Advertising
4. Test-fit the parts. Position a few 2-inch-thick brick or patio block scraps inside the pot to prop up the hot plate for air circulation. Place the pie pan for wood chips on top of the hot plate, insert the cooking grate, and then add the cover. When everything fits, you’ll be ready to start smoking. Prop the pot on three bricks or patio blocks. If your cooking grate wobbles or tilts, create three support lips for the grate to rest on using dabs of silicone caulk on the inside of the larger pot.
5. Get smokin’. Position the smoker outdoors on a noncombustible surface in a sheltered area. On the trial run of my homemade smoker, a 5-pound brisket took 4-1/2 hours to get to the recommended internal temperature of 180 degrees Fahrenheit. Some trial and error will be required to find the hot plate setting that will keep your DIY smoker within the desired temperature range — between 210 and 220 degrees. Use gloves to handle the hot components of your smoker, and keep curious kids and pets away from the designated smoking area.

